
If you’ve scrolled through TikTok or Pinterest lately, you’ve definitely seen it — the wolf cut. It’s wild, layered, and effortlessly cool, combining the messy edge of a shag with the softness of curtain bangs. But while it looks amazing on your favorite influencers, trying it at home can sometimes turn into a “hair horror story” moment.
The good news? You can get that tousled, voluminous wolf cut look without damaging your hair or ending up with uneven layers. The trick lies in careful prep, smart cutting choices, and gentle styling.
Let’s break down how to get the viral wolf cut safely and make it look like you just stepped out of a salon, not a DIY disaster.

Understanding the Wolf Cut
Before you grab your scissors, it’s important to understand what makes the wolf cut so unique. It’s a mix between two beloved styles: the ’70s shag and the ’90s mullet. The goal is volume on top, texture throughout, and feathery ends that move naturally.
This look works for straight, wavy, or curly hair but the layering technique should be adapted to your hair texture. Fine hair needs softer layers to avoid thinning it out too much, while thick hair can handle more dramatic, choppy cuts.
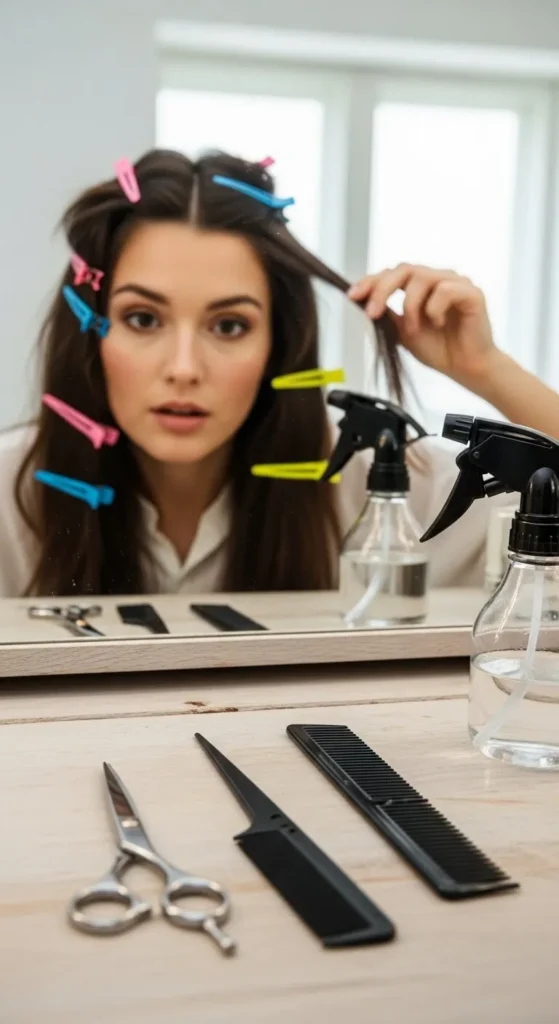
Step 1: Prep Before You Cut
Even if you’re planning to get your wolf cut at a salon, prepping your hair first helps your stylist (or yourself) achieve cleaner, more even layers.
- Wash and condition your hair with a lightweight, volumizing formula. You don’t want heavy products that flatten texture.
- Dry completely. Cutting dry or mostly dry hair ensures you can see the actual length and shape of your layers.
- Brush out tangles and separate your hair into sections — top, sides, and back — using clips.
If you’re doing this at home, invest in sharp haircutting shears. Dull scissors can cause split ends and fraying that make the style look messy instead of edgy.
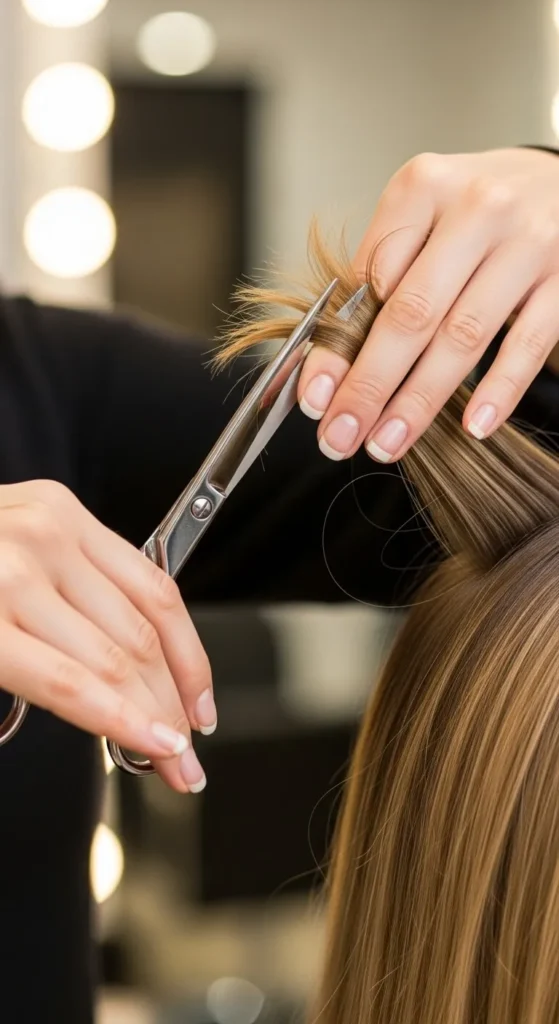
Step 2: Start with Gentle Layers
Here’s the number one rule for the wolf cut: less is more at first. You can always add more layers, but you can’t glue them back on.
- Gather your top section. Pull the top half of your hair into a high ponytail on top of your head — this is where the volume starts.
- Trim small sections at a time. Cut a little off the ends at an angle, using the point-cutting technique for softer results.
- Release and shape. Let the hair down, see how it falls, and trim more if needed for balance.
Don’t go for super short front layers right away. Start with chin-length framing pieces that you can adjust later based on your face shape.
If your hair is curly or wavy, remember that your curls will bounce up once dry — always cut slightly longer than you think you need.
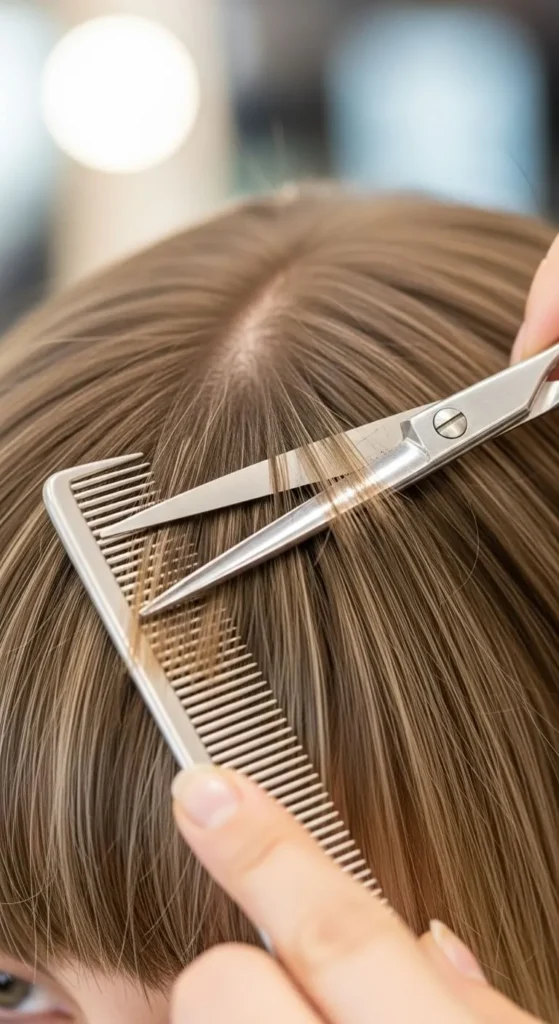
Step 3: Frame the Face with Curtain Bangs
The signature feature of every wolf cut is the curtain bangs. They soften the choppy layers and make the haircut wearable for every face shape.
- Start small. Take a front section about one inch wide.
- Cut diagonally inward. Trim from just below the cheekbone toward the nose bridge.
- Blend gradually. Use a comb to blend your bangs into the top layers.
For round faces, longer bangs that curve below the jawline work best. For oval or heart-shaped faces, go shorter around the eyes to highlight cheekbones.
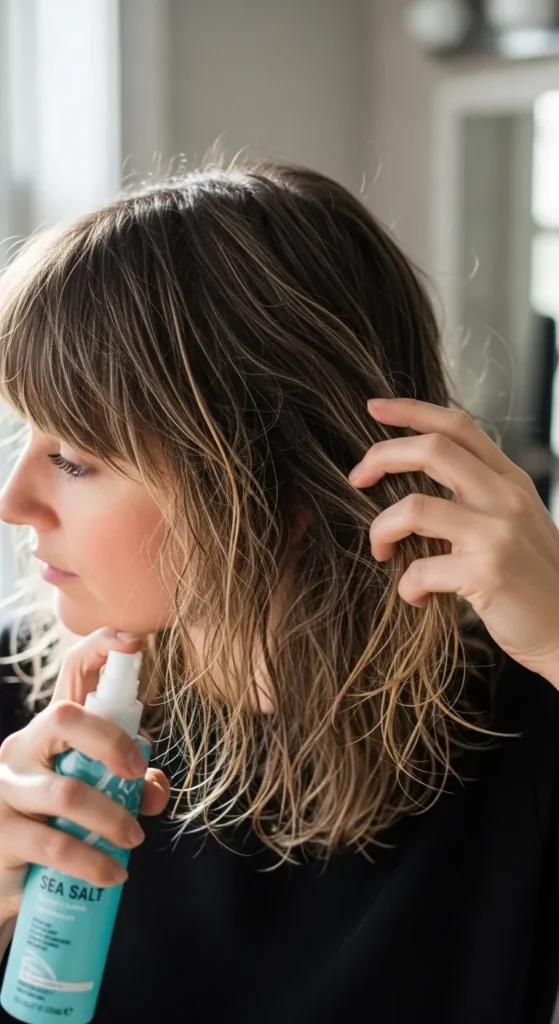
Step 4: Style Without Heat Damage
The beauty of the wolf cut is that it’s meant to look undone. But that doesn’t mean frizzy. To style it safely and make it pop, use lightweight products that enhance your natural texture.
- For straight hair: Use a texturizing spray or dry shampoo at the roots and scrunch for volume.
- For wavy hair: Apply a curl-enhancing mousse and air dry for soft waves.
- For curly hair: Use a lightweight leave-in conditioner and let your curls define naturally.
If you must use heat, protect your strands with a thermal spray and keep the temperature low. Diffusing on a cool setting can also boost volume without frying your ends.
Step 5: Maintain the Look Without Overcutting
Because the wolf cut thrives on movement, it actually looks better as it grows out. But you’ll still want to keep the shape fresh.
- Trim every 8–10 weeks to maintain texture and remove split ends.
- Use a nourishing mask once a week. Look for formulas with keratin, argan oil, or shea butter to keep hair healthy.
- Avoid over-layering. Too many layers can make your hair look thin or uneven, especially if you have fine hair.
If you find your layers losing shape, a quick touch-up with thinning shears (just at the ends!) can restore the feathered look.
Step 6: Customize Your Wolf Cut
What’s great about the wolf cut is that it’s totally adaptable. You can make it as subtle or dramatic as you want.
- Soft Wolf Cut: Ideal for beginners—gentle layers and long bangs for a lived-in look.
- Bold Wolf Cut: Lots of choppy layers and shorter bangs for a rockstar vibe.
- Curly Wolf Cut: Diffused curls and shape-defining cream to highlight texture.
- Colored Wolf Cut: Add balayage or soft highlights to emphasize the layers.
Want even more lift? Try a little root-lifting powder or dry shampoo before styling—it gives that messy, full-bodied finish that defines the cut.

Step 7: Protect Your Hair from Damage
Because this cut involves multiple layers, weak or over-processed hair can show damage faster. To keep your wolf cut healthy and shiny:
- Avoid daily heat styling. Let your natural texture lead.
- Use silk or satin pillowcases. They reduce breakage and frizz overnight.
- Limit chemical treatments. Space out coloring or bleaching sessions.
- Trim regularly. Removing split ends helps your layers stay bouncy and fresh.
Healthy hair will always make your wolf cut look more intentional and stylish, no matter your texture or color.
The Takeaway
The wolf cut might look rebellious, but with the right technique, it’s surprisingly easy to pull off and maintain. It’s fun, low-maintenance, and flatters almost every face shape when done right.
The key is to start slow, protect your strands, and embrace your natural texture. Once you’ve nailed your shape, you’ll have that effortlessly cool, lived-in look that’s been all over your feed.
So grab your inspiration photos, prep your hair, and go for it. Just remember—confidence is the best part of any haircut.
Save this guide for later, and get ready to rock your best wolf cut yet.

Leave a Reply