
There’s something effortlessly cool about beach waves, the kind of hair that looks like you just stepped off the sand and into the city. The best part? You don’t need a curling iron or straightener to get them. In fact, with a few simple tricks, you can create soft, natural waves overnight or even while you sip your morning coffee.
If you’ve ever wanted that tousled, undone texture without damaging your hair, this guide walks you through the easiest ways to get it, no heat required.

Start with the Right Prep
To get those loose, carefree waves, your hair needs a little help from the right foundation.
- Begin with clean, damp hair. Wash using a lightweight shampoo and conditioner—nothing too heavy or moisturizing. You want your hair to have texture, not slip.
- Towel-dry gently. Don’t rub. Just press and squeeze to remove excess water.
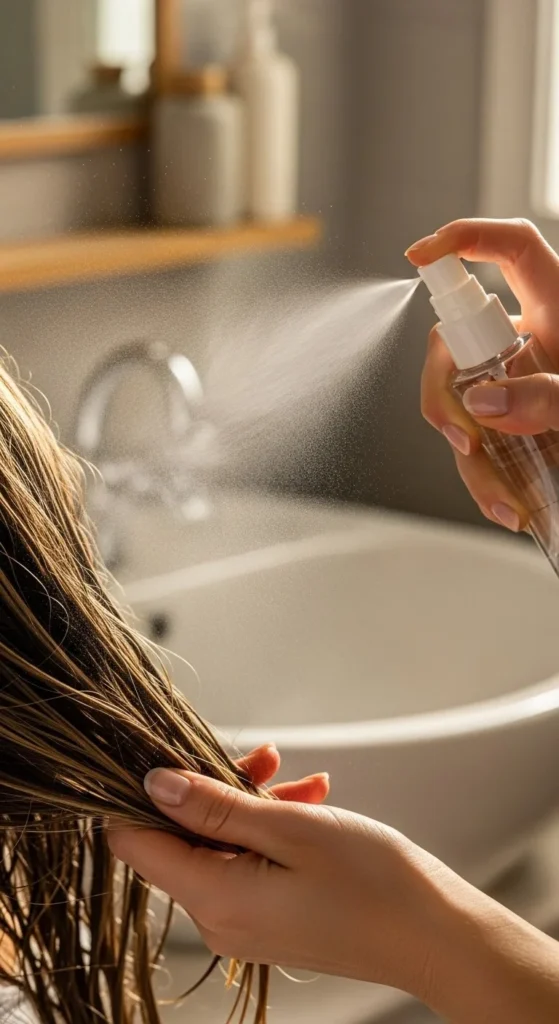
- Add texture right away. A salt spray or wave-enhancing mousse helps form that lived-in texture from the start.
If your hair is naturally straight, texture products are your secret weapon. They add grip and make waves last longer.
Twist, Braid, or Bun—Pick Your Wave Style
Here’s where the magic happens. Depending on your hair length and desired look, there are a few easy, heat-free ways to create beachy waves.
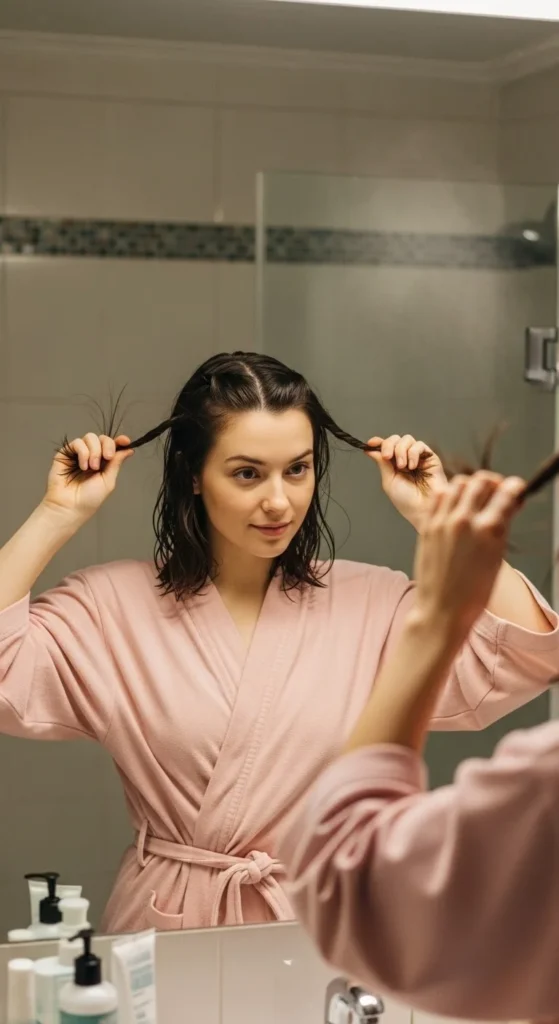
1. The Twisted Method
- Divide your damp hair into two sections.
- Twist each side tightly and secure with a soft scrunchie.
- Let it air dry completely, or sleep with it overnight.
- In the morning, untwist and separate with your fingers—no brush needed.
This technique gives you loose, natural bends, perfect for a casual, surfer-girl vibe.
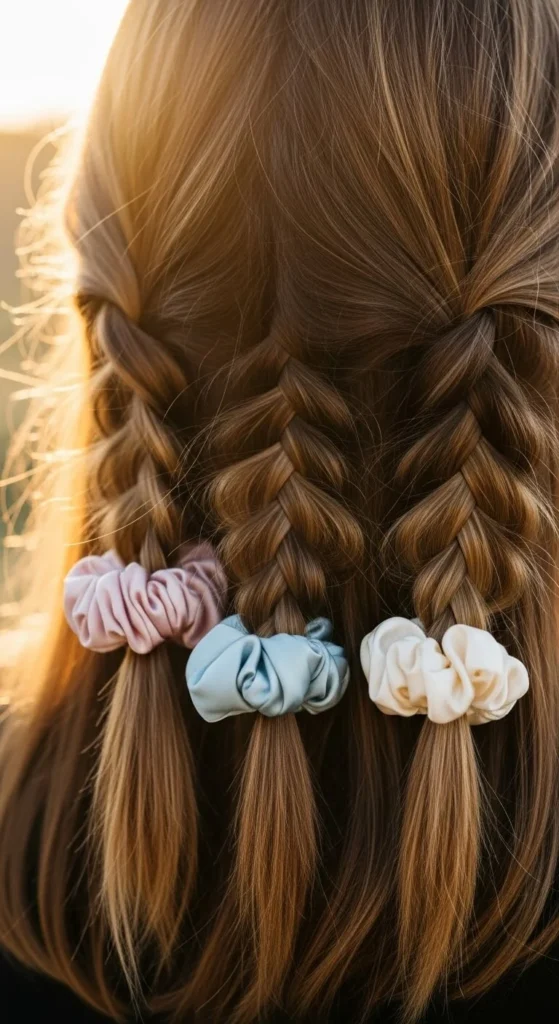
2. The Braid Method
If you love uniform, wavier texture, go for classic braids.
- Make two or more braids (the more you do, the tighter your waves).
- Sleep with them overnight.
- In the morning, unravel and shake out with your hands.
Finish with a light spritz of sea salt spray or dry shampoo for extra body.
3. The Bun Method
For soft, natural waves that start lower down:
- Gather damp hair into one or two loose buns.
- Secure gently with clips or hair ties.
- After a few hours, release and finger-comb for relaxed, flowy waves.
This one’s ideal if you prefer waves with less volume at the roots.
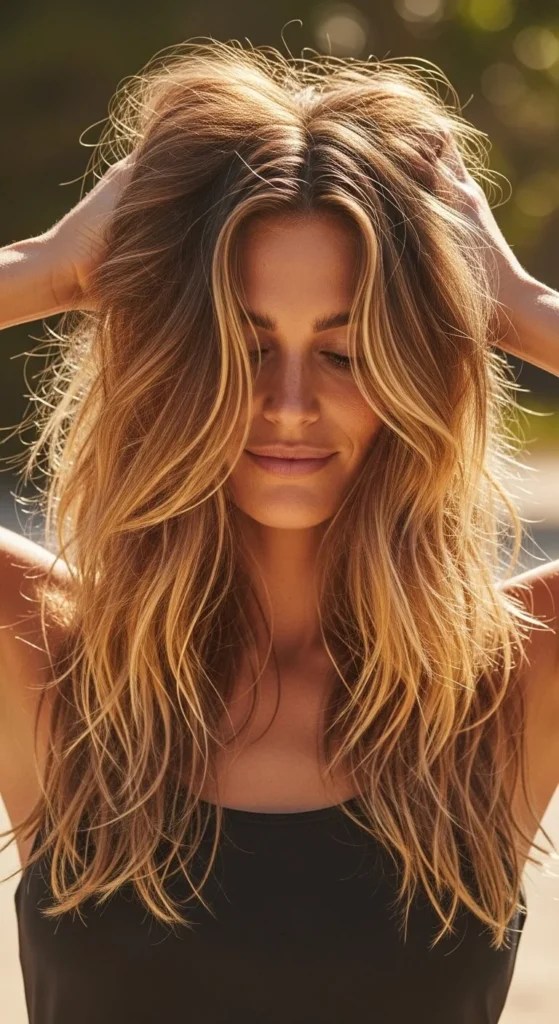
Enhance and Define the Texture
Once your hair is dry and the waves are set, it’s time to give them definition.
- Loosen with fingers. Avoid using a brush—it can make your waves frizzy.
- Add a touch of dry texture spray. This keeps the waves looking soft but not limp.
- Try a touch of styling cream. Rub a pea-sized amount between your palms and lightly scrunch into your hair ends to control frizz and add shine.
If you’re heading out, you can add a touch of finishing oil just to the ends—it keeps everything smooth while enhancing that natural beachy shine.
Maintain the Look All Day
The secret to keeping your waves bouncy and fresh? A little bit of care throughout the day.
- Avoid brushing once your style is set.
- Use a silk or satin scrunchie if you need to tie your hair.
- Refresh with a bit of salt spray or texturizing powder at the roots when needed.
- Sleep on a silk pillowcase—it prevents friction and helps waves last into the next morning.

Quick DIY Sea Salt Spray Recipe
If you love doing things naturally, make your own texture spray at home:
- 1 cup of warm water
- 1 tsp sea salt
- ½ tsp coconut oil (for softness)
- A few drops of essential oil for scent
Shake well and spritz lightly onto damp hair before styling. It gives that authentic “just back from the ocean” feel—without the sand.

The Takeaway
Natural beach waves don’t need to come from a curling iron. With the right prep, a little twisting or braiding, and the perfect touch of product, you can achieve that effortless, sun-kissed texture anytime you want.
It’s low effort, low damage, and totally Pinterest-worthy. So go ahead—skip the heat, embrace the waves, and save this guide for your next “lazy hair day” inspiration.

Leave a Reply